Unlock the Secret to Crispy Oven Bacon: The Game-Changing Cold Oven Trick
For lovers of breakfast, brunch, or simply a delicious snack, few things hit the spot quite like perfectly crispy bacon. But achieving that ideal crunch without the stovetop mess can often feel like a culinary quest. Standing over a sputtering skillet, dodging hot grease, and constantly flipping strips is hardly the serene cooking experience we dream of. What if there was a way to consistently produce impeccably crisp, evenly cooked bacon with minimal fuss and cleanup? Prepare to have your bacon-making world transformed by a simple, yet ingenious technique: the cold oven trick. This guide will show you exactly how to cook bacon in the oven, ensuring mouthwatering results every single time.
Baking bacon in the oven isn't just a convenient alternative; it's a superior method that yields unparalleled results. This hands-off approach liberates you from stovetop duty, allowing you to focus on other breakfast preparations or simply enjoy a quiet moment with your coffee. Gone are the days of unevenly cooked, rubbery, or burnt bacon. Embrace the oven, and specifically, the wisdom of starting cold, to elevate your bacon game to professional levels.
Why Cooking Bacon in the Oven is a True Game-Changer
If you're accustomed to the traditional pan-frying method, the idea of baking bacon might seem unconventional. However, countless home cooks and professional chefs have made the switch, and for good reason. The benefits of cooking bacon in the oven extend far beyond just avoiding splatters:
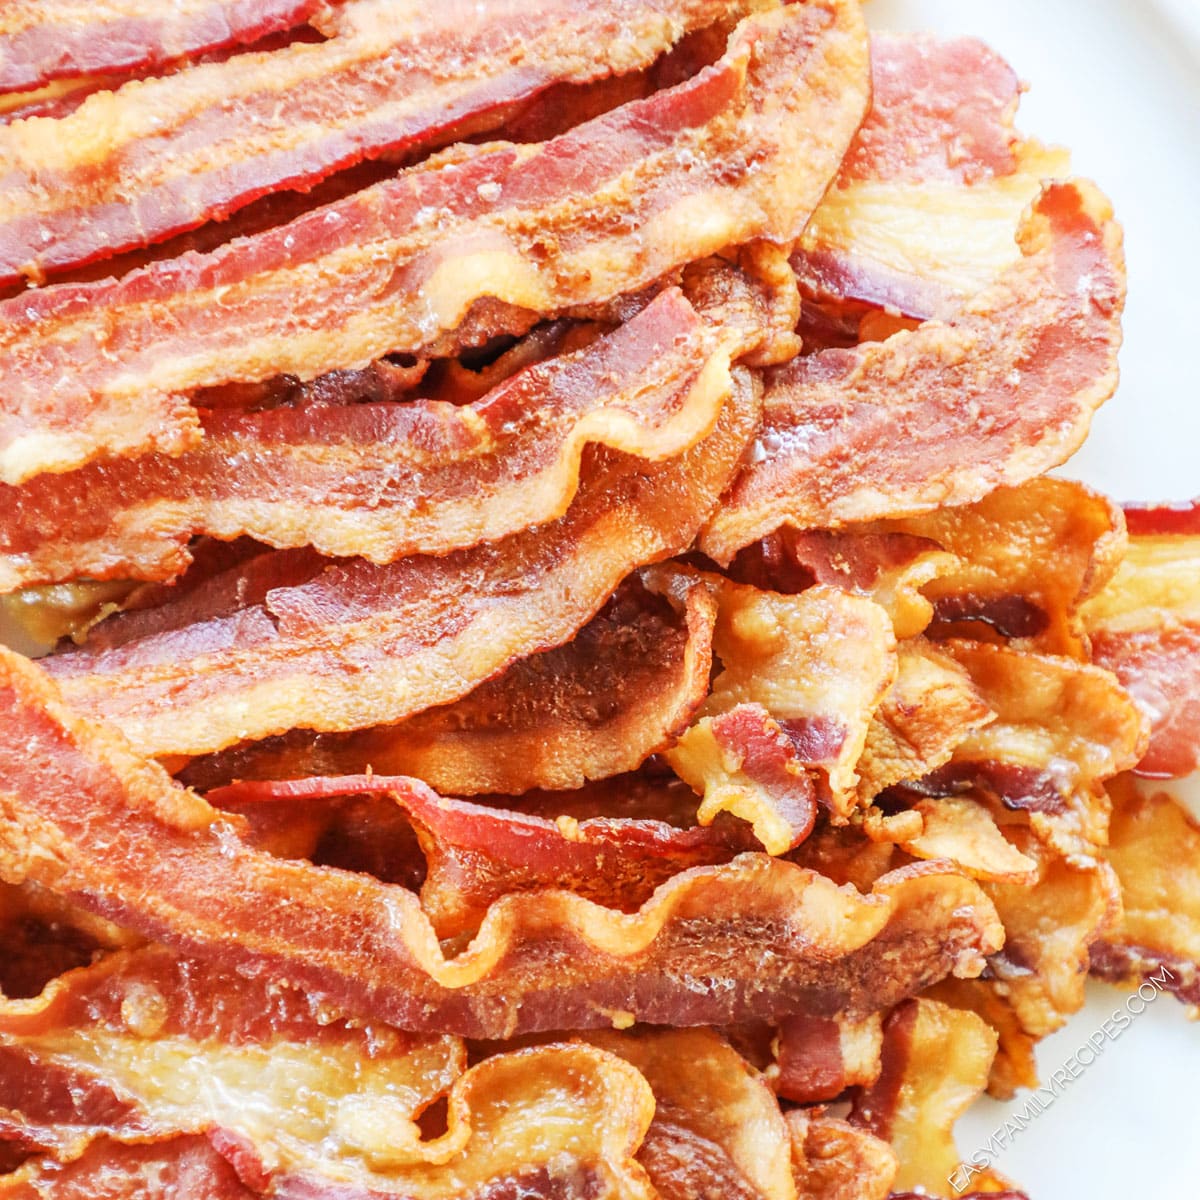
- Unmatched Even Crispiness: Unlike a skillet where heat distribution can be inconsistent, an oven provides a uniform cooking environment. Each strip of bacon lies flat, allowing the heat to circulate evenly around it, resulting in edge-to-edge crispness without curled edges or chewy spots.
- Significantly Less Mess: This is arguably the most celebrated benefit. By containing the bacon within the oven, you eliminate the notorious grease splatter that coats your stovetop, countertops, and even walls. Cleanup becomes a breeze, especially with a foil-lined baking sheet.
- Effortless Batch Cooking: Whether you're feeding a hungry family, hosting brunch for friends, or meal-prepping for the week, a standard baking sheet can accommodate a full package of bacon (12-16 ounces) in a single layer. This scalability makes oven bacon ideal for any size crowd, saving you from cooking multiple batches.
- Hands-Off Freedom: Once the bacon is in the oven, your work is largely done. This frees up your attention to whisk eggs, toast bread, prepare fruit, or simply relax. It’s a truly set-it-and-forget-it approach to a crucial breakfast component.
Once you experience the ease and perfection of this oven method, you'll likely never look back. For more comprehensive insights into this culinary shift, you might want to explore our article Easy Oven Bacon: The Mess-Free Way to Crispy Perfection.
The Genius of the Cold Oven Method: Your Not-So-Secret Trick
Here’s where the true magic happens, the secret weapon that guarantees consistent, perfect crispiness: do not preheat your oven. While it might go against conventional cooking wisdom, starting your bacon in a cold oven is the cornerstone of this technique. But why does this seemingly counterintuitive step work so brilliantly?
Understanding the Science Behind the Cold Start
Bacon is essentially thin strips of pork belly, rich in both muscle and fat. When you place bacon into an already hot oven or a searing-hot skillet, the intense, immediate heat can cause the muscle fibers to seize up rapidly, shrinking the strips and causing them to curl. Simultaneously, the fat might not have enough time to render slowly and evenly before the meat itself becomes overly browned or even charred. This often leads to an undesirable texture: crispy in some spots, chewy or burnt in others, and perpetually curled.
By starting the bacon in a cold oven and allowing it to heat up gradually, you give the fat ample time to render out slowly and consistently. As the oven temperature rises, the fat gently melts and liquefies, releasing itself from the meat. This slow rendering process is crucial because:
- It ensures the bacon cooks flat, preventing curling and creating a larger surface area for even browning.
- It allows the bacon to essentially fry in its own released fat, achieving a superior, uniform crispness from end to end.
- It minimizes internal oven splattering, as the fat melts and renders at a controlled pace rather than explosively reacting to high heat.
This technique, honed in professional kitchens and beloved by home cooks, is the definitive answer to achieving that coveted, consistently crispy bacon that lies perfectly flat on your plate. It's truly the best way to answer the question of how to cook bacon in the oven for flawless results.
Your Step-by-Step Guide: How to Cook Bacon in the Oven Flawlessly
Ready to experience the best bacon of your life? This method is incredibly straightforward and adaptable to all types of bacon, from regular-cut to thick-cut varieties. Just follow these simple steps:
Equipment You'll Need:
- Large baking sheet (rimmed is best to contain grease)
- Aluminum foil or parchment paper
- Tongs (for easy handling)
- Paper towel-lined plate (for draining)
The Method:
- Prepare Your Baking Sheet: Line a large, rimmed baking sheet with aluminum foil or parchment paper. Foil is often preferred for its ease of cleanup, as you can simply crumple and discard it along with the rendered fat. Parchment paper also works wonderfully, preventing sticking and making transfer easy.
- Arrange the Bacon: Lay the bacon strips in a single layer on the prepared baking sheet. It's okay if the strips touch slightly, but avoid overlapping them. Overlapping will prevent even cooking and crisping. For very thick-cut bacon, giving them a little more space can be beneficial.
- Cold Oven Start is Key: Place the baking sheet with the arranged bacon into a cold oven. This step is non-negotiable for achieving the best results.
- Set the Temperature: Close the oven door, then set your oven to 400°F (200°C). As the oven slowly preheats to this temperature, the bacon fat will gradually render, allowing the strips to cook down and crisp up beautifully.
- Bake to Perfection: The cooking time will vary depending on the thickness of your bacon and your desired level of crispness.
- For regular-cut bacon, expect it to take about 12-18 minutes.
- For thick-cut bacon, it may take 18-25 minutes, or even a little longer.
- Drain and Serve: Once your bacon has reached its ideal crispiness – golden brown and firm – carefully remove the baking sheet from the oven. Using tongs, transfer the cooked bacon strips to a plate lined with several layers of paper towels. This allows any excess rendered fat to drain off, enhancing its crisp texture. Let it cool for a minute or two before serving, as it will continue to crisp slightly as it cools.
For even more nuanced strategies and troubleshooting tips to ensure every batch is perfect, take a look at our detailed guide: How to Get Perfectly Crispy Oven Bacon Every Time.
Tips for Perfect Oven Bacon and Beyond
While the cold oven trick is foolproof, a few additional tips can elevate your bacon experience even further:
Choosing Your Bacon:
- Thickness Matters: Regular-cut bacon will cook faster and be very crispy. Thick-cut bacon yields a meatier bite with a satisfying crunch. Adjust cooking times accordingly.
- Flavor Profiles: Experiment with different types like applewood smoked, hickory smoked, or peppered bacon to discover your favorites. Each will perform similarly in the oven.
Maximizing Crispness & Flavor:
- Don't Overcrowd: While strips can touch slightly, leaving a bit of space between them ensures air circulation and prevents steaming, which can hinder crisping.
- Watch Closely: Bacon can go from perfectly done to overdone in a flash. Start checking a few minutes before the minimum recommended time, especially if it's your first time with a particular cut or oven.
- A Touch of Sweetness: For a gourmet twist, try sprinkling a tiny bit of brown sugar or a drizzle of maple syrup over the bacon during the last 5 minutes of cooking. This creates candied bacon, a delightful sweet and savory treat.
Handling the Rendered Fat:
Don't discard that precious bacon grease! Once it's cooled and solidified on the foil, you can easily scrape it into a heat-safe container (like a glass jar) and store it in the refrigerator. Bacon fat adds incredible flavor to roasted vegetables, scrambled eggs, cornbread, and even popcorn.
Storage and Reheating:
Cooked bacon can be stored in an airtight container in the refrigerator for up to 4-5 days. To reheat, you can use a microwave for a few seconds (it might lose some crispness), or for best results, warm it gently in a skillet or pop it back into a preheated oven (around 350°F/175°C) for a few minutes until crisp again.
Conclusion: Embrace the Oven for Bacon Perfection
Learning how to cook bacon in the oven using the cold oven trick is more than just a recipe; it's a fundamental shift in how you'll approach making this beloved breakfast staple. By embracing this simple yet powerful method, you're guaranteed consistently crispy, perfectly cooked bacon every single time, without the usual mess and fuss. Free up your stovetop, reclaim your morning, and savor the superior taste and texture that only oven-baked bacon can deliver. Go ahead, give it a try – your taste buds (and your clean kitchen) will thank you.
